To know when a form was submitted in WordPress, check the submission timestamp in your form plugin’s database. Most plugins store this data automatically.
Tracking form submissions is crucial for website management. It helps you monitor user interactions and gather valuable information. Many WordPress plugins offer built-in features to log form submissions. These features often include timestamps, making it easy to see when each form was submitted.
By regularly reviewing this data, you can optimize your website’s performance and improve user experience. Plugins like Contact Form 7, WPForms, and Gravity Forms provide detailed logs. These logs include submission times, user details, and other relevant information. Ensure you regularly check these logs to stay updated and make informed decisions.
Setting Up WordPress Forms
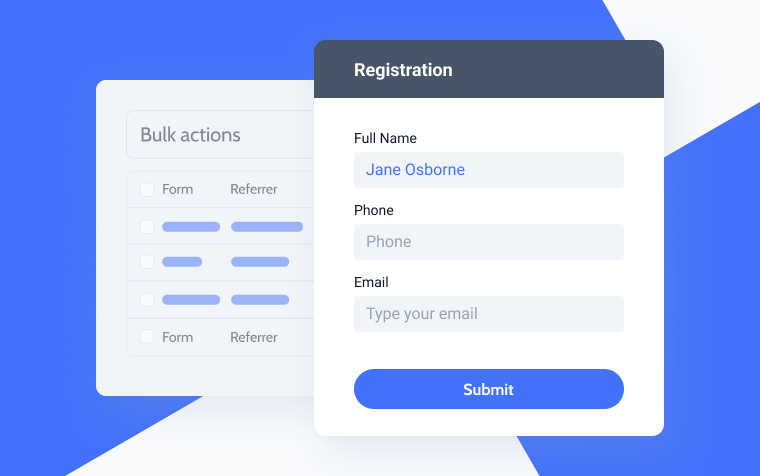
Creating forms in WordPress can help gather user information. Whether it’s for a contact form or a survey, setting up WordPress forms is essential. This section will guide you through the process of setting up your forms.
INFO: How to Make My Website Template WordPress: Step-by-Step Guide
Choosing A Plugin
The first step is to choose a plugin that suits your needs. There are many plugins available, both free and premium. Some popular choices include:
- Contact Form 7
- WPForms
- Gravity Forms
Each of these plugins offers unique features. For basic forms, Contact Form 7 is a great choice. For more advanced features, consider WPForms or Gravity Forms.
Installing The Plugin
Once you have chosen your plugin, you need to install it. Follow these steps:
- Navigate to your WordPress dashboard.
- Go to Plugins > Add New.
- Search for the plugin name.
- Click Install Now.
- After installation, click Activate.
With the plugin activated, you are ready to start creating forms. Each plugin has its own setup process. Refer to the plugin documentation for detailed instructions.
For example, with WPForms:
- Go to WPForms > Add New.
- Choose a template or start from scratch.
- Drag and drop form fields to customize your form.
- Click Save when done.
Your form is now ready to use. Embed it on any page or post using a shortcode.
Configuring Form Notifications
Configuring form notifications ensures you stay informed about submissions. This helps you respond promptly and keeps your workflow smooth. Proper configuration means you never miss important information from your forms.
Email Notifications
Email notifications are essential for prompt responses. To configure email notifications in WordPress:
- Go to your WordPress dashboard.
- Navigate to the form plugin settings.
- Select the form you want to edit.
- Find the Notifications or Email Settings section.
- Enter the recipient’s email address.
- Customize the email subject and message.
Make sure to include important details like:
- Form title
- Submission date and time
- Submitted data
Admin Notifications
Admin notifications help site administrators stay updated. To configure admin notifications:
- Access your WordPress dashboard.
- Go to the form plugin settings.
- Choose the form to edit.
- Locate the Admin Notifications section.
- Add the admin email address.
- Customize the notification message as needed.
Ensure the admin notifications include:
- Form name
- Submission timestamp
- Key data points from the form
Properly configured notifications help you stay organized and efficient. This ensures you never miss a form submission.
INFO: How to Create a Landing Page on Shopify: Step-by-Step Guide
Using Plugin Logs
Tracking form submissions in WordPress is crucial. Using plugin logs, you can easily find out when a form was submitted. Plugins can automatically log important data, making your job simpler.
Accessing Logs
First, you need to access the logs. Here’s a simple step-by-step guide:
- Login to your WordPress dashboard.
- Navigate to the Plugins section.
- Locate and select your form plugin (e.g., WPForms, Gravity Forms).
- Click on the Settings or Logs tab.
Some plugins have a dedicated section for logs. Check the documentation if you can’t find it easily.
Interpreting Log Data
Once you access the logs, you need to interpret the data. Here are some common fields you will see:
| Field | Description |
|---|---|
| Timestamp | The exact time the form was submitted. |
| Form ID | Identifies which form was submitted. |
| User ID | Identifies the user who submitted the form. |
| IP Address | Tracks the submitter’s IP address. |
Timestamp is the most critical field. It tells you the exact submission time. Make sure to note this data for records.
Form ID helps you identify which form was submitted, useful if you have multiple forms.
User ID can help track submissions by registered users. This field may be empty for guest submissions.
IP Address helps in identifying the origin of the submission. It can be useful for security purposes.
Third-party Services
Using third-party services to track form submissions in WordPress can simplify the process. These services offer robust features that can enhance your website’s functionality. They provide seamless integration options and comprehensive tracking capabilities.

Integration Options
Integrating third-party services with WordPress is easy. You can use plugins, APIs, or custom code. Here are some popular methods:
- Plugins: Many WordPress plugins offer easy integration.
- APIs: Custom API integrations provide more flexibility.
- Custom Code: Developers can write custom code for specific needs.
Plugins are user-friendly and require no coding skills. APIs are more advanced but offer extensive customization. Custom code is ideal for unique requirements.
Popular Services
Several third-party services are popular for tracking form submissions. Each service has unique features and benefits. Below are some top choices:
| Service | Features |
|---|---|
| Google Analytics | Comprehensive tracking and reporting. |
| Zapier | Automated workflows and integrations. |
| Mailchimp | Email marketing and form tracking. |
Google Analytics is excellent for detailed insights. Zapier automates tasks and integrates with many apps. Mailchimp is perfect for email marketing and tracking forms.
Choose a service that fits your needs. Ensure it supports the features you require. These services can greatly enhance your form tracking capabilities.
INFO: How Does Tradelle Work: Unveiling the Secrets to Success
Custom Code Solutions
To know when a form was submitted in WordPress, you can use custom code solutions. These methods provide control and flexibility. This section covers basic and advanced custom code techniques.
Basic Php Script
Using a simple PHP script can log the form submission time. Here’s how to do it:
- Open your WordPress theme’s
functions.phpfile. - Add the following code snippet:
function log_form_submission() {
    $submission_time = current_time('mysql');
    error_log('Form submitted at: ' . $submission_time);
}
add_action('wpforms_process_complete', 'log_form_submission', 10, 4);
This code logs the submission time in the error log. Use current_time('mysql') to get the current time.
Advanced Tracking
Advanced tracking requires more complex code. This method can store submission times in the database.
Follow these steps:
- Create a custom table in the database:
function create_custom_table() {
    global $wpdb;
    $table_name = $wpdb->prefix . 'form_submissions';
    $charset_collate = $wpdb->get_charset_collate();

    $sql = "CREATE TABLE $table_name (
        id mediumint(9) NOT NULL AUTO_INCREMENT,
        submission_time datetime DEFAULT '0000-00-00 00:00:00' NOT NULL,
        PRIMARY KEY  (id)
    ) $charset_collate;";

    require_once( ABSPATH . 'wp-admin/includes/upgrade.php' );
    dbDelta( $sql );
}
add_action('after_setup_theme', 'create_custom_table');
- Insert submission time into the table:
function insert_submission_time() {
    global $wpdb;
    $table_name = $wpdb->prefix . 'form_submissions';
    $submission_time = current_time('mysql');

    $wpdb->insert(
        $table_name,
        array(
            'submission_time' => $submission_time,
        )
    );
}
add_action('wpforms_process_complete', 'insert_submission_time', 10, 4);
This code creates a table and stores each submission time. It uses the wpdb class to interact with the database.
These custom code solutions allow precise tracking. Use them to enhance your WordPress form handling.
Testing Form Submissions
Testing form submissions in WordPress is crucial. It ensures your forms work properly. This process helps identify and fix issues before they affect users. Let’s dive into how to test form submissions effectively.
Creating Test Submissions
First, create a test submission to check your form’s functionality. Follow these steps:
- Go to your WordPress dashboard.
- Navigate to the page with your form.
- Fill out the form with test data.
- Submit the form.
Use different data types to cover various scenarios. For example, test with valid and invalid email addresses. This ensures your form handles all inputs correctly.

Checking Notifications
After submitting your test form, check the notifications. Make sure you receive the expected emails. Follow these steps:
- Go to your email inbox.
- Look for the notification email from the form.
- Open the email and review the details.
Verify that all information appears correctly. If there’s missing or incorrect data, revisit your form settings. Adjust the notification settings as needed.
| Step | Action |
|---|---|
| 1 | Check email settings in your form plugin. |
| 2 | Ensure the correct recipient email is set. |
| 3 | Save changes and retest the form. |
By regularly testing your form submissions, you can maintain a smooth user experience. This proactive approach helps catch issues early, ensuring your forms work seamlessly.
Troubleshooting
Are you having trouble knowing when a form was submitted in WordPress? Don’t worry! This guide will help you solve common issues and provide easy fixes and workarounds.
Common Issues
Sometimes, forms may not show the submission date or time. This could be due to:
- Plugin conflicts
- Incorrect settings
- Outdated plugins
- Cache issues
These problems can make it hard to track form submissions accurately.
Fixes And Workarounds
Follow these steps to fix common form submission issues:
- Check Plugin Compatibility: Ensure all plugins are up-to-date and compatible with your theme.
- Review Form Settings: Verify that the form settings include submission timestamps. Most form plugins have this option.
- Clear Cache: Sometimes, cached pages can cause issues. Clear the website cache to see recent changes.
- Use Debugging Tools: Enable debugging to identify conflicts. Most plugins have a debug mode to help find issues.
- Consult Plugin Support: If you still have issues, consult the plugin’s support team. They can provide specific solutions.
By addressing these common issues and applying the fixes, you can ensure accurate form submission tracking in WordPress.
INFO: How to Add Messenger to Shopify: Boost Customer Engagement
Frequently Asked Questions
How To Check Form Submission Date In WordPress?
You can check the form submission date using plugins like WPForms or Contact Form 7.
Can I Track Form Submissions In WordPress?
Yes, you can track form submissions using plugins that offer submission tracking features.
What Plugins Help Monitor WordPress Form Submissions?
Plugins like WPForms, Gravity Forms, and Contact Form 7 help monitor form submissions effectively.
Conclusion
Mastering how to know when a form was submitted in WordPress is crucial. It enhances your site’s functionality. Utilize plugins or custom code to track submissions effectively. Stay informed about user interactions to optimize your strategy. Implement these tips for a seamless experience on your WordPress site.