To build a Shopify store, sign up for an account and choose a suitable theme. Add products, set up payment options, and launch your store.
Creating an online store with Shopify can be a game-changer for your business. Shopify provides an easy-to-use platform with various customizable themes, enabling you to create a unique storefront. This user-friendly platform helps you manage products, payments, and shipping seamlessly.
With built-in SEO tools, you can optimize your store for search engines and attract more customers. Whether you sell physical products, digital goods, or services, Shopify offers the flexibility to cater to your needs. Start building your Shopify store today and take your business to the next level.
Introduction To Shopify
Starting an online store is easy with Shopify. Shopify is a simple and powerful platform. It helps you create and run your online business. With Shopify, you can sell products, manage inventory, and process payments.
What Is Shopify?
Shopify is a leading e-commerce platform. It allows anyone to create an online store. Shopify is user-friendly and has many features. It supports both small and large businesses.
Shopify offers various plans to suit your needs. It also has a large app store. Here, you can find tools to enhance your store.

Benefits Of Using Shopify
Using Shopify has many benefits. Here are the key advantages:
- Easy to Use: Shopify is simple, even for beginners.
- Secure: Shopify ensures your store is safe and secure.
- 24/7 Support: Get help anytime from Shopify’s support team.
- Mobile-Friendly: Shopify stores look great on mobile devices.
- Customizable: Choose from many themes and templates.
Shopify also offers integrated payment options. This makes it easy to accept payments from customers.
| Feature | Description |
| SEO Tools | Helps your store rank higher on search engines |
| Analytics | Track your store’s performance and sales |
| Marketing Tools | Promote your store with built-in marketing features |
Info: How to Remove Powered by Shopify: Easy Steps & Tips
Shopify is a robust and flexible platform. It makes starting an online store easy and efficient.
Setting Up Your Account
Setting up your account is the first step in building your Shopify store. This section will guide you through creating an account and choosing a pricing plan. Let’s dive in!
Creating An Account
To create an account, visit the Shopify website. Click on the “Get Started” button. You will need to fill out a form with your email address, password, and store name. Make sure to choose a unique store name. After filling out the form, click “Create your store.”
Next, you will be asked a few questions about your business. These include whether you are already selling and what industry your business belongs to. Answer these questions accurately to get the best recommendations from Shopify.
Choosing A Pricing Plan
After creating your account, you will need to choose a pricing plan. Shopify offers several plans to suit different business needs. Here’s a quick overview:
| Plan | Monthly Cost | Features |
| Basic | $29 | Includes basic features and online store |
| Shopify | $79 | Includes professional reports and more staff accounts |
| Advanced | $299 | Includes advanced report builder and third-party shipping rates |
Info: Is Shopify Legit: Unveiling the Truth Behind the Platform
Consider your business needs and budget before selecting a plan. You can always upgrade or downgrade later. Once you have chosen a plan, click “Choose this plan” and enter your payment details.
Congratulations! You have successfully set up your Shopify account. Now you are ready to start building your store.
Customizing Your Store
Creating a unique and engaging Shopify store is crucial for success. Customizing your store allows you to reflect your brand’s identity. Start by selecting a theme that matches your vision. Then, tailor it to suit your needs. Let’s dive into the details.
Selecting A Theme
Choosing the right theme sets the tone for your store. Shopify offers a wide range of themes. Some are free, while others are premium. To choose a theme:
- Go to your Shopify admin panel.
- Navigate to Online Store > Themes.
- Browse the theme store.
Consider factors like design, functionality, and customer experience. Make sure the theme is mobile-friendly. Check customer reviews and ratings. Pick a theme that aligns with your brand’s aesthetics.
Customizing The Theme
Once you’ve selected a theme, it’s time to customize it. Customization helps you stand out. Follow these steps to personalize your theme:
- Go to Online Store > Themes in your admin panel.
- Click Customize on your chosen theme.
Within the customization panel, you can:
- Change the colors: Pick colors that match your brand.
- Upload your logo: Add your logo to the header.
- Edit the layout: Adjust sections and blocks.
Use the drag-and-drop editor for easy adjustments. Preview changes before saving them. Customizing your store enhances the shopping experience.
Remember to save your changes frequently. Regular updates keep your store fresh and engaging.
Adding Products
Adding products is a crucial step in building your Shopify store. This is where you showcase what you sell. Let’s dive into how to add products effectively.
Product Descriptions
Your product descriptions need to be clear and compelling. A good description helps customers understand the product.
- Use short sentences to keep it easy to read.
- Highlight key features with bullet points.
- Include size, color, and material details.
Here’s an example of a great product description:
Product: Cozy Winter Sweater
Description:Material: 100% WoolColor: Red, Blue, GreenSizes: S, M, L, XLPerfect for cold weather
Keep it simple and informative.
Product Images
Product images are vital for your store’s success. They help customers visualize the product.
- High-quality images: Ensure images are clear and well-lit.
- Multiple angles: Show the product from different angles.
- Zoom feature: Allow customers to zoom in on the product.
Consider the following tips for your product images:
| Tip | Details |
| Background | Use a plain background for a clean look. |
| Lighting | Natural light works best for product photos. |
| Consistency | Keep the style consistent across all images. |
Good images can increase your sales.
Setting Up Payments
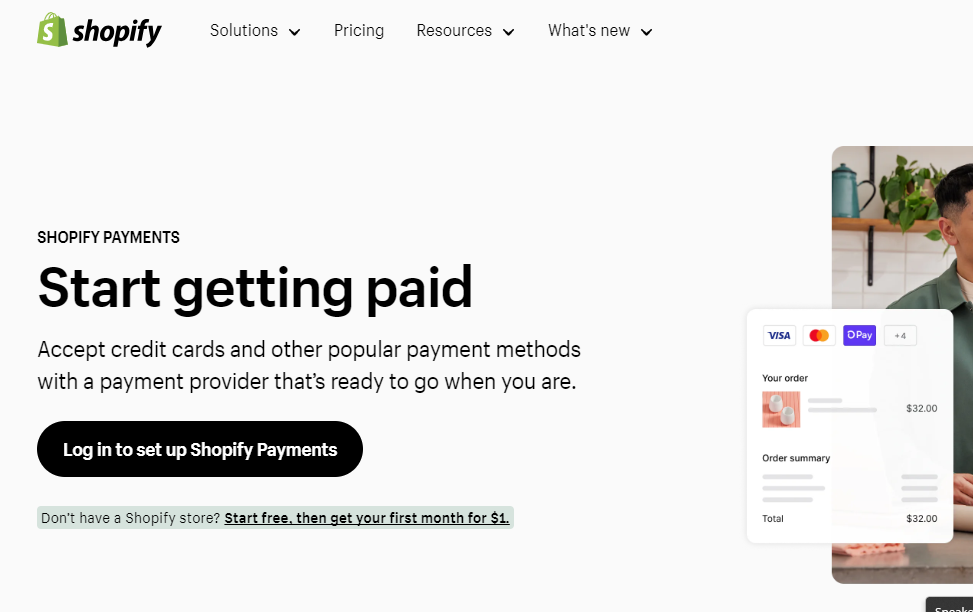
Setting up payments is a crucial step in building your Shopify store. It ensures you can receive money from your customers securely and efficiently. This section covers Choosing Payment Methods and Configuring Payment Gateways.
Choosing Payment Methods
Selecting the right payment methods can increase your sales. Shopify offers a variety of options. Here are some popular choices:
- Credit/Debit Cards: Accept payments from major card providers.
- PayPal: A trusted and widely used payment method.
- Apple Pay: Convenient for iPhone users.
- Google Pay: Easy for Android users.
Choose methods that suit your customers’ preferences. Offering multiple options can improve your store’s conversion rate.
Info: What Shopify Theme is This? Discover the Best Themes
Configuring Payment Gateways
A payment gateway processes transactions on your store. Shopify supports many gateways. Follow these steps to configure a payment gateway:
- Log in to your Shopify admin panel.
- Navigate to Settings and then Payments.
- Select the payment gateway you want to use.
- Enter the required details like API key and secret.
- Test the payment gateway to ensure it works correctly.
Here’s a table summarizing some popular payment gateways and their features:
| Payment Gateway | Transaction Fees | Supported Currencies |
| Stripe | 2.9% + 30¢ per transaction | 135+ |
| PayPal | 2.9% + 30¢ per transaction | 25+ |
| Authorize.Net | 2.9% + 30¢ per transaction | Multiple |
Configuring these gateways ensures smooth transactions. This can enhance customer trust and increase sales.
Configuring Shipping
Setting up shipping is vital for your Shopify store. It ensures your customers receive their orders promptly and accurately. This guide will help you configure shipping zones and shipping rates.
Shipping Zones
Shipping zones define where you will ship your products. Follow these steps to set up shipping zones:
- Log in to your Shopify admin panel.
- Go to Settings > Shipping and delivery.
- Under Shipping, click Manage rates.
- Click Create shipping zone.
- Name your shipping zone, e.g., Domestic or International.
- Select the countries or regions you want to include.
- Save your changes.
Shipping Rates
Shipping rates determine how much customers pay for shipping. Here’s how to set up shipping rates:
- Go to Settings > Shipping and delivery.
- Under the shipping zone you created, click Add rate.
- Choose either Set up your own rates or Use carrier or app to calculate rates.
- If setting your own rates:
- Enter a name for the rate, e.g., Standard Shipping.
- Set the price, e.g., $5.00.
- Optionally, add conditions based on order weight or price.
- If using carrier rates:
- Select a carrier, like USPS or FedEx.
- Configure the carrier’s settings as needed.
- Save your changes.
Here’s a quick reference table for different shipping zones and rates:
| Shipping Zone | Shipping Rate | Price |
| Domestic | Standard Shipping | $5.00 |
| Domestic | Express Shipping | $10.00 |
| International | Standard Shipping | $20.00 |
| International | Express Shipping | $40.00 |
Info: How to Make Shopify Store Look Professional: Expert Tips
Configuring shipping properly ensures smooth transactions and happy customers. Follow these steps to set up your Shopify store’s shipping effectively.
Launching Your Store
Launching your Shopify store is an exciting milestone. It’s the moment you share your products with the world. To ensure a smooth launch, follow these crucial steps. Testing and publishing your store are the final touches before going live.
Testing Your Store
Before launching, it’s vital to test your store. This ensures everything works perfectly. Here are key points to check:
- Payment Gateways: Ensure all payment methods function correctly.
- Shipping Settings: Verify shipping rates and options.
- Product Listings: Check for accurate product descriptions and prices.
- Checkout Process: Complete a test purchase to spot issues.
Testing helps you catch and fix errors. It ensures a seamless shopping experience.
Publishing Your Store
After testing, it’s time to publish your store. Follow these steps:
- Remove Password Protection: Go to Online Store > Preferences. Uncheck “Enable password” to make your store public.
- Set Up Your Domain: Choose a custom domain for your store. This makes your store look professional.
- Announce Your Launch: Use social media and email to tell everyone. Include a link to your store.
Publishing your store makes it accessible to customers. This is the final step to start selling.
| Action | Description |
| Test Payment Gateways | Ensure all payment methods work without issues. |
| Verify Shipping Settings | Check shipping rates and options are correct. |
| Complete a Test Purchase | Simulate a customer purchase to spot problems. |
| Remove Password Protection | Make your store public by disabling the password. |
| Set Up Your Domain | Choose a custom domain for a professional look. |
| Announce Your Launch | Use social media and email to share your store link. |
Promoting Your Store
Once your Shopify store is live, you need to attract customers. Effective promotion is key to driving traffic and increasing sales. Here are some proven strategies to promote your Shopify store successfully.
Seo Best Practices
Search Engine Optimization (SEO) improves your store’s visibility on search engines. Follow these best practices to enhance your SEO:
- Keyword Research: Identify relevant keywords for your products.
- Meta Descriptions: Write compelling meta descriptions for each product.
- Alt Text for Images: Use descriptive alt text for all images.
- Internal Linking: Link related products and pages within your store.
- Mobile Optimization: Ensure your store is mobile-friendly.
Social Media Marketing
Social media platforms are excellent for promoting your store. Use these tips to leverage social media effectively:
- Create Business Profiles: Set up business accounts on platforms like Facebook, Instagram, and Twitter.
- Engaging Content: Post regularly with engaging content like images, videos, and stories.
- Hashtags: Use relevant hashtags to increase your reach.
- Influencer Collaborations: Partner with influencers to promote your products.
- Paid Ads: Invest in paid advertising to target specific audiences.
By following these strategies, you can effectively promote your Shopify store and attract more customers. Remember, consistency is key in both SEO and social media marketing.
Frequently Asked Questions
How Much Does It Cost To Build A Shopify Store?
Building a Shopify store typically costs between $29 and $299 per month, depending on the plan. Additional costs include domain, themes, and apps.
Can I Build A Shopify Store Myself?
Yes, you can build a Shopify store yourself. Shopify provides user-friendly tools and templates. No coding skills required.
How Much Money Should I Have To Start A Shopify Store?
To start a Shopify store, you need at least $29 per month for the Basic plan. Additional costs include domain name, marketing, and apps. Budget around $100-$500 for initial setup.
How Profitable Is A Shopify Store?
A Shopify store’s profitability varies based on niche, marketing, and management. Successful stores can generate significant revenue. Careful planning and execution are key.
Conclusion
Building a Shopify store is a rewarding endeavor. Follow these steps to create a successful online business. Keep learning and optimizing your store for better performance. Implement effective marketing strategies to drive traffic and boost sales. A well-crafted Shopify store can help you achieve your e-commerce goals.
Start today and watch your business grow.