Meta tags are crucial for enhancing your website’s SEO and improving search engine rankings. They provide search engines with important information about your content, helping to attract more visitors. WordPress offers several plugins, such as Yoast SEO and All in One SEO Pack, which simplify the process of adding meta tags. To add meta tags in WordPress, install a plugin like Yoast SEO. Then, navigate to the plugin settings and add your meta tags.
These plugins guide you through adding meta descriptions, keywords, and titles to your posts and pages. Using these tools ensures that your content is optimized for search engines, making it easier for users to find your site. Properly configured meta tags can significantly boost your website’s visibility and search performance.

Understanding Meta Tags
Meta tags play a crucial role in SEO. They help search engines understand your content. This improves your website’s visibility and ranking. Let’s dive into the details of meta tags.
What Are Meta Tags?
Meta tags are snippets of text. They describe a page’s content. Meta tags do not appear on the page itself. They exist in the page’s code. They help search engines and browsers understand your website.
Common Types Of Meta Tags
There are several types of meta tags. Each serves a different purpose. Here are the most common ones:
- Title Tag: This defines the title of your webpage. It’s crucial for SEO.
- Meta Description: This tag provides a brief summary of the page. It appears in search engine results.
- Meta Keywords: This tag lists relevant keywords. Search engines use it to understand your page’s topic.
- Robots Meta Tag: This controls how search engines index your page. It can allow or disallow indexing.
- Viewport Meta Tag: This optimizes your page for mobile devices. It ensures your content displays correctly.
Here is an example of how to add a meta tag:
In WordPress, you can add meta tags using a plugin. Yoast SEO and All in One SEO Pack are popular choices. These plugins make it easy to manage meta tags.
Info: How to Add Google Analytics to WordPress Site: Step-by-Step Guide
Preparing Your WordPress Site
Before adding meta tags in WordPress, you must prepare your site. Proper preparation ensures smooth updates and protects your content. Follow these steps to get started.
Backup Your Site
Always backup your site before making any changes. This keeps your data safe. Use a reliable backup plugin like UpdraftPlus or BackupBuddy.
- Install the backup plugin.
- Activate the plugin.
- Follow the plugin instructions to create a backup.
Store your backup in a secure location. This ensures you can restore your site if needed.
Choose A Reliable Plugin
To add meta tags, use a trusted plugin. A reliable plugin simplifies the process and enhances your site’s SEO.
Popular choices include:
| Plugin | Features |
|---|---|
| Yoast SEO | Meta tags, XML sitemaps, and readability analysis. |
| All in One SEO Pack | Meta tags, social media integration, and XML sitemaps. |
| Rank Math | Meta tags, keyword optimization, and Google Search Console integration. |
Info: How to Clear Cache in WordPress Without Plugin: Quick Guide
Install and activate your chosen plugin. Follow the setup wizard to configure basic settings. This prepares your site for adding meta tags.
Installing A Meta Tag Plugin
Adding meta tags to your WordPress site can boost your SEO. Using a plugin simplifies the process. This guide will walk you through the steps.
Popular Plugin Options
Several plugins are available for adding meta tags. Here are some popular choices:
- Yoast SEO: A comprehensive SEO plugin with meta tag options.
- All in One SEO Pack: Another feature-rich SEO plugin.
- Meta Tag Manager: Focuses solely on meta tags.
Step-by-step Installation
Follow these steps to install a meta tag plugin:
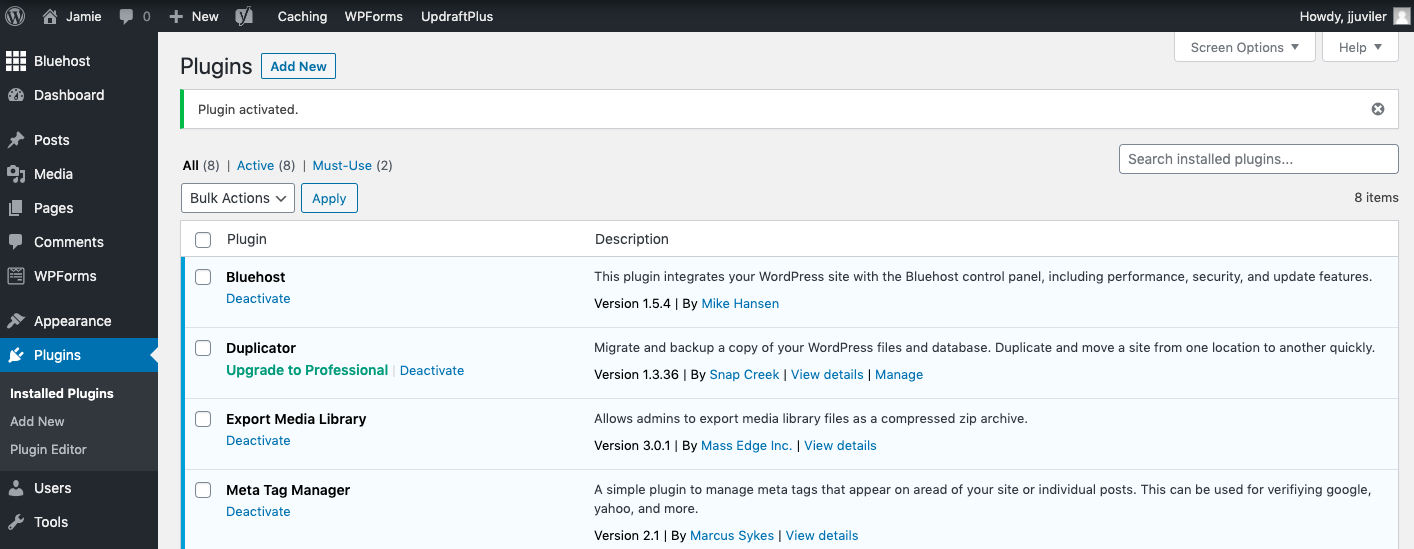
- Go to your WordPress dashboard.
- Click on Plugins in the sidebar.
- Select Add New.
- In the search bar, type the plugin name, like Yoast SEO.
- Click Install Now.
- Once installed, click Activate.
Now, configure your plugin to add meta tags:
- Navigate to the plugin settings in your dashboard.
- Enter your desired meta tags for each page or post.
- Save your changes.
Using a plugin ensures your meta tags are added correctly. It also helps keep your site optimized for search engines.
Adding Meta Tags To Your Site
Meta tags play a crucial role in your site’s SEO. These tags help search engines understand your content. They also improve your site’s visibility. Here’s a simple guide to adding meta tags in WordPress.
Accessing The Plugin Settings
To start, you need a plugin. Popular choices include Yoast SEO and All in One SEO Pack. Follow these steps to access the plugin settings:
- Log in to your WordPress dashboard.
- Go to the Plugins section.
- Click Add New and search for the SEO plugin.
- Install and activate the plugin.
- Once activated, find the plugin settings in the left sidebar.
Entering Meta Tag Information
After accessing the plugin settings, you can add meta tags. Here’s how:
- Navigate to the SEO section in the dashboard.
- Select the Meta Tags option.
- Enter your meta title in the title field.
- Add a meta description in the description field.
- Include relevant keywords in the keywords field.
- Save your changes.
Here’s an example of a well-structured meta tag:
Follow these steps for each page or post. This ensures each page is optimized for search engines. Check your meta tags regularly to keep them updated and relevant.
Info: How to Unpublish WordPress Site: Step-by-Step Guide
Customizing Meta Tags
Customizing meta tags in WordPress is essential for better SEO. Meta tags help search engines understand your content. They also improve your site’s visibility. Let’s dive into tailoring meta tags for different pages and best practices for keywords.
Tailoring For Different Pages
Every page on your site needs unique meta tags. This helps search engines differentiate content. Tailoring meta tags for different pages is easy with WordPress.
Use a plugin like Yoast SEO or All in One SEO. These plugins allow custom meta tags for each page. Follow these steps:
- Install and activate your chosen SEO plugin.
- Open the page or post you want to edit.
- Scroll down to the plugin’s meta box.
- Enter a unique meta title and meta description.
- Save your changes.
A well-tailored meta tag should include the page’s main keyword. It should be clear and concise. Ensure it reflects the page content accurately.
Best Practices For Keywords
Using the right keywords in meta tags boosts your SEO. Here are some best practices:
- Use primary keywords in the meta title and description.
- Keep the meta title under 60 characters.
- Keep the meta description under 160 characters.
- Include secondary keywords naturally.
- Avoid keyword stuffing.
Here’s an example of a good meta tag:
Remember to review and update your meta tags regularly. This ensures they stay relevant and effective.

Verifying Meta Tags
Verifying meta tags ensures they are correctly implemented and functioning. This step is crucial for improving your website’s SEO. Proper verification helps search engines read your site accurately.
Using Browser Tools
Browser tools are great for verifying meta tags. Here’s a simple way to do it:
- Open your website in a browser.
- Right-click and select Inspect or press Ctrl+Shift+I.
- Go to the Elements tab.
- Look for the section.
- Check for your meta tags within the section.
Ensure all your meta tags are present. Verify their content is accurate.
Third-party Verification Tools
Third-party tools can also help verify your meta tags. Here are some popular options:
- Google Search Console: Use the URL Inspection tool.
- SEMrush: Provides detailed analysis of your meta tags.
- Ahrefs: Checks for missing or incorrect meta tags.
These tools offer detailed insights. They help ensure your meta tags are optimized.
| Tool | Feature | Benefit |
|---|---|---|
| Google Search Console | URL Inspection | Accurate meta tag verification |
| SEMrush | Meta tag analysis | Detailed insights for SEO |
| Ahrefs | Meta tag checker | Find missing tags |
Info: How to Remove Noindex Tag in WordPress: Quick and Easy Steps
Use these tools regularly. They help maintain your website’s SEO health.
Maintaining Meta Tags
Maintaining meta tags is crucial for ongoing SEO success in WordPress. Proper maintenance ensures your website stays relevant and visible. This section will delve into two key practices: Regular Updates and Monitoring Performance.
Regular Updates
Search trends and algorithms change over time. Your meta tags should reflect these changes. Regularly update your tags to include new keywords. Ensure the content matches current user queries.
Consider the following steps for regular updates:
- Review the performance of current meta tags.
- Identify new trending keywords using tools like Google Trends.
- Update meta descriptions to be more engaging.
- Ensure all pages have unique and relevant meta tags.
Monitoring Performance
Monitoring the performance of your meta tags is essential. It helps identify what works and what doesn’t. Use tools like Google Analytics and Search Console.
Create a schedule to review performance metrics. Include the following columns in your table:
| Page URL | Meta Tag | Clicks | Impressions | Click-Through Rate (CTR) |
|---|---|---|---|---|
| /example-page | Example Meta Tag | 500 | 10,000 | 5% |
| /another-page | Another Meta Tag | 300 | 8,000 | 3.75% |
Analyze these metrics to optimize your meta tags further. Adjust keywords and descriptions based on performance data.
Regular updates and monitoring performance are the backbone of effective meta tag maintenance. These practices ensure your WordPress site remains optimized and competitive.

Troubleshooting Issues
Adding meta tags in WordPress can sometimes be tricky. You might face various issues that can hamper your SEO efforts. This section will help you troubleshoot common problems.
Common Problems
- Meta tags not appearing on the site
- Meta tags displaying incorrect information
- Conflicts with other plugins
- Slow website performance
Tips For Resolution
Follow these tips to resolve common issues with meta tags in WordPress:
| Problem | Solution |
|---|---|
| Meta tags not appearing | Ensure the plugin is activated.Check if the theme supports meta tags.Clear your website cache. |
| Incorrect information | Double-check your meta tag settings.Update the plugin to the latest version.Verify that you have filled all fields correctly. |
| Plugin conflicts | Deactivate other plugins one by one to find the conflict.Look for alternative plugins that are compatible. |
| Slow performance | Optimize your images and scripts.Use a caching plugin to speed up your site. |
Info: How to Edit Footer in WordPress: Step-by-Step Guide
Frequently Asked Questions
What Are Meta Tags In WordPress?
Meta tags are snippets of text that provide information about your webpage. They help search engines understand your content.
How Do I Add Meta Tags In WordPress?
You can add meta tags using SEO plugins like Yoast or All in One SEO. These plugins simplify the process.
Why Are Meta Tags Important In WordPress?
Meta tags improve your site’s SEO by helping search engines understand your content. They also affect click-through rates.
Can I Manually Add Meta Tags In WordPress?
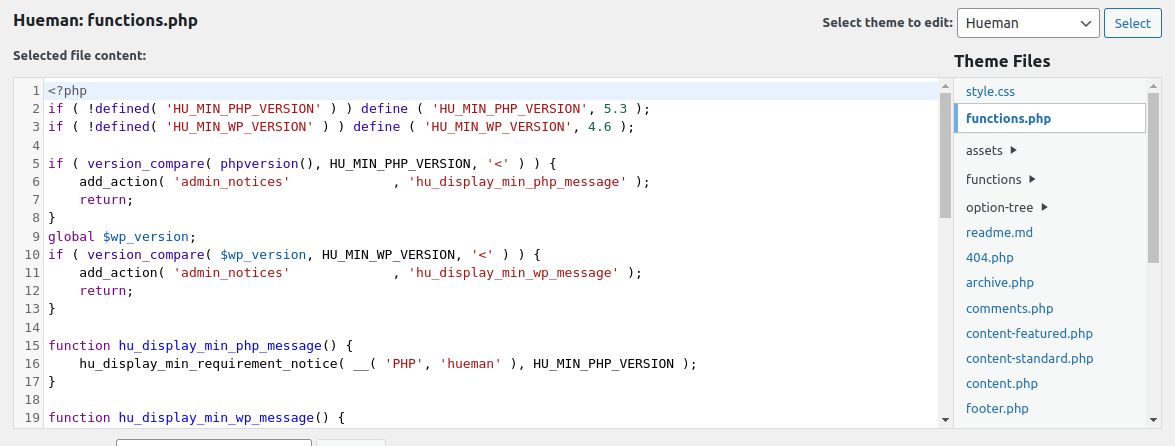
Yes, you can manually add meta tags by editing your theme’s header. php file. However, using a plugin is easier.
Conclusion
Adding meta tags in WordPress is essential for improving SEO and website visibility. Use plugins like Yoast SEO for easy integration. Regularly update your meta tags to stay relevant and boost rankings. By following these steps, you ensure your WordPress site is optimized for search engines.
Happy blogging!


